 Deutsch
 English
 Türkçe
Old Continent
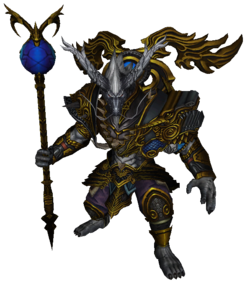
Zodiac Temple
Weekday-dependent dungeon with 40 floors.
From Level 20


 Body Warrior
 Mental Warrior

 Weapon Sura

Location:
Zodiac Temple
Entry Requirements:
 12 Anima Spheres
Time Limit:
• 10 Minutes per Floor
Cooldown:
• None
Brief Description:
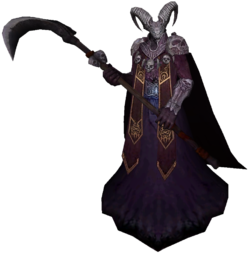
- The easiest dungeon for beginners is the Lightning run "Chen", which is open on Wednesdays and Sundays.
- The dungeon consists of 40 floors. If you complete a floor within a certain time, you can skip several floors. The final Zodiac boss awaits on floor 34.
- There are floors with fixed tasks and others that can have different tasks (kill monsters, kill bosses, destroy Metin Stones). Additionally, there are bonus floors where you don't have to defeat monsters.
- On floors 6, 12, 19, and 24, you must not die, otherwise the run is lost. If you die on another floor, you can only revive with
.png) Prism of Awakening. These can be obtained through a quest from Monk Milbon or at the Zodiac merchant on the 40th floor.
Prism of Awakening. These can be obtained through a quest from Monk Milbon or at the Zodiac merchant on the 40th floor.
Rewards:
•

Golden Zodiac Chest per Char
•

Red Zodiac Chests (if Merchant)
 Note: Although the temple can be entered from level 20, you can only complete it with a higher level and better equipment.
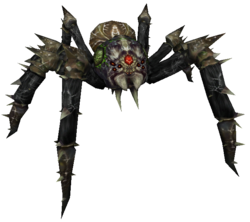
Spider Queen's Nest
One of the first dungeons in the game.
From Level 50
Body Warrior
Mental Warrior
Weapon Sura
Location:
Spider Dungeon 3 (SD3)
Entry Requirements:
 Arachnid Key
Time Limit:
• 20 Minutes
Cooldown:
• 60 Minutes
Brief Description:
- Only one Arachnid Key is required per group.
- First you must kill the Spider Baron, then the Spider Baroness will spawn.
- Destroying the spider eggs reduces the Spider Baroness's defense, but simultaneously increases her attack. You must therefore find the right balance.
Rewards:
•

Titan Shield
•

Pet Book Chest
•

Passage Ticket (up to 5x)
•

Teleportation Ring (up to 5x)
Note: This dungeon is not really lucrative and is only worthwhile at a server start.
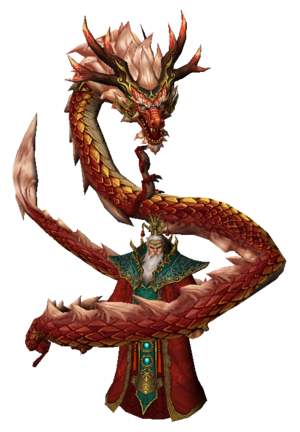
Palace of the Dragon King
Weekly dungeons for guilds.
From Level 70


Location:
Guild Land
Entry Requirements:
 1 - 10 King's Keys
Time Limit:
• 60 Minutes
Cooldown:
• 1 Week (Reset Sunday Night)
Brief Description:
- All dungeons have the same structure. There are two rooms.
- In the first room, all monsters must be defeated, with waves of monsters continuously spawning.
- In the second room, the boss must be defeated. It is recommended to position a tank in a corner to separate the remaining monsters from the boss.
Rewards:
•

Bravery Medals
Note: There are a total of 5 guild runs that can be completed once per week. You can receive a total of 1250 Bravery Medals per char.
Demon Tower
Classic dungeon with 9 floors.
From Level 40 / 75
Body Warrior
Mental Warrior
Weapon Sura
Location:
Hwang Temple
Entry Requirements:
Time Limit:
• 3 Hours
Cooldown:
• None
Brief Description:
- Nowadays, the Demon Tower is more of a dungeon to complete the quest to access the "Devil's Catacomb" dungeon. There are no worthwhile drops.
- The dungeon spans 9 floors, with a level 75 group member required to access floor 7 and above.
- The floor tasks consist of killing monsters or defeating Metin Stones.
- After successfully completing floor 6, a Demon Tower Blacksmith appears. At this blacksmith, you can upgrade items without upgrade materials. On failure, the item is destroyed. The upgrade probability is increased by +10% of the item's base chance (20% ➔ 30%).
Rewards:
•

Shrunken Head
•

Glass of Search
Note: You don't get any relevant items from this dungeon. It is only worthwhile for the Devils Catacomb quest and for the blacksmith.
Devil's Catacomb
Successor to the Demon Tower.
From Level 75
Body Warrior
Mental Warrior
Weapon Sura
Location:
Hwang Temple
Entry Requirements:
Shrunken Head
Time Limit:
• 60 Minutes
Cooldown:
• 30 Minutes
Brief Description:
- The timer only starts when you enter the second level.
- On the second level, you fight your way through gates to reach the interior of the catacombs.
- Then you destroy Metin Stones, search for Tartaros on the outer islands, deliver his totem at the mountain peak, and eliminate Charon and his hordes.
- Finally, you defeat Azrael in his throne room.
Rewards:
•
Titan Shield
Note: This dungeon requires the completed Demon Tower. The dungeon is usually only worthwhile at server starts.
Dragon Beran-Setaou
First worthwhile low-level dungeon.
From Level 75
Body Warrior
Mental Warrior
Weapon Sura
Location:
Grotto of Exile 2
Entry Requirements:
 5 Coiled Keys (1x) or
 70 Dragon Lair Entry (5x)
Time Limit:
• 60 Minutes
Cooldown:
• 24 Hours
Brief Description:
- You can complete the dungeon 6 times daily.
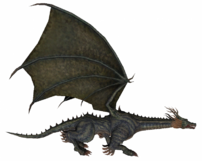
- At the beginning and every 2:30 minutes, Metin Stones spawn that strengthen the dragon. Only after all Metin Stones are destroyed can you damage the dragon.
- When Metins spawn, you should first destroy the Metin of Arrogance and Metin of Solitude, as these affect the dragon's HP regeneration.
- By using animal seals from the Rotten Wooden Boxes, you can significantly increase damage to certain Metin Stones.
Rewards:
•

8-10 Beran-Setaou Chests
•

Reinforce Item
•

Enchant Item
•

Much Yang
Note: The dragon’s Yang drop decreases with higher levels. The chests can be dropped at any level.
.png)
Enigma Temple C
Random dungeon with varying location.
Level 75 - 90
Location:
Varies
Entry Requirements:
Treasure Scroll (Grade C)
Time Limit:
• None
Cooldown:
• None
Brief Description:
- The first level is always the same. You must defeat waves of monsters and destroy a Metin Stone.
- The second level offers two challenges, one of which is randomly selected:
- Metin Stone Level: Destroy Metin Stones until the treasure chest is found.
- Enigma General: Defeat monsters until the Enigma General appears. After defeating the General, the treasure chest appears.
- Afterwards, you have a chance to enter the bonus level.
- Locations in blue text have a higher chance for a bonus room.
Rewards:
•
.png)
Treasure Chest (Grade C)
•

Enigma Temple Bonus
•
Chance for Bonus Level
Note: Location varies depending on treasure scroll. All classes can participate.
Meley's Lair - Group
A group dungeon that only brings Gaya.
From Level 75
Location:
Fire Land
Entry Requirements:
Passage Ticket
Time Limit:
• 60 Minutes
Cooldown:
• None
Brief Description:
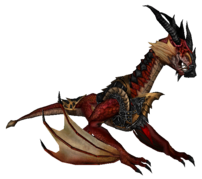
- The dungeon consists of multiple phases. The goal is to destroy the four statues, which will then defeat Meley.
- First Phase: You must damage the statues so they only have 75% HP left. The pillars then turn orange and you can no longer deal damage.
- Second Phase: From the second phase onwards, dragon eggs repeatedly appear, which must be destroyed to continue. You damage the statues down to 50% HP. All statues glow orange again.
- Third Phase: Dragon Watcher Idall appears and must be defeated to continue. Then you damage the statues down to 1% HP. The statues now glow blue.
- Final Phase: Once all four statues glow blue, you must place a
 Dragon Fire Ring on each of them within 10 seconds. This defeats Meley, and you can then collect your reward.
Rewards:
•

Gem
•

Gaya
Note: Once a week you receive 100 - 400 Gaya depending on your ranking in the leaderboard.
Meley's Lair - Guild
Only accessible with guild members. Max. 16 Chars.
From Level 90
Location:
Fire Land
Entry Requirements:
Passage Ticket (Meley)
Time Limit:
• 60 Minutes
Cooldown:
• 3 Hours
Brief Description:
- The dungeon consists of multiple phases. The goal is to destroy the four statues, which will then defeat Meley.
- First Phase: You must damage the statues so they only have 75% HP left. The pillars then turn orange and you can no longer deal damage.
- Second Phase: From the second phase onwards, dragon eggs repeatedly appear, which must be destroyed to continue. You damage the statues down to 50% HP. All statues glow orange again.
- Third Phase: Dragon Watcher Idall appears and must be defeated to continue. Then you damage the statues down to 1% HP. The statues now glow blue.
- Final Phase: Once all four statues glow blue, you must place a Dragon Fire Ring on each of them within 10 seconds. This defeats Meley, and you can then collect your reward.
Rewards:
•

Queen Meleys Chest
•
Dragon Watcher Chest
Note: With the Passage Tickets (Meley) you can bypass the cooldown. The chests contain, among other things, a lot of Yang.
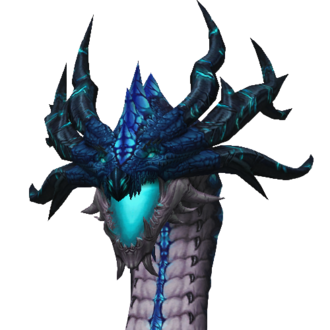
Ship Defence / Hydra
Very lucrative dungeon.
From Level 90
Location:
Cape Dragon Fire
Entry Requirements:
Passage Ticket
Time Limit:
• None
Cooldown:
• 20 Minutes
Brief Description:
- The run consists of four phases. Throughout the entire time, you must ensure that the mast is not destroyed.
- First Phase: You must protect the mast from a few waves of monsters.
- 3x Hydra Head Phase: You must defeat each Hydra head before the mast is destroyed.
- Hydra Eggs: Spawn during the Hydra head phases. When destroyed, all monsters despawn.
- Hydra's Brood: Drops repair wood upon death, which restores 50,000 HP to the mast but puts the player in unconsciousness for a short time.
- Tips: Pull the Siren Queen with your second character during the Hydra head phases so she cannot damage the mast. Destroy the Hydra eggs to despawn the monsters.
Rewards:
•

0-5 Hydra Chest
•

Nessie Egg
•

Crimson Ebony Box
•

Blue Ebony Box
•

Green Ebony Box
•

Enchant Item B
•

Reinforce Item B
•

Redux Tome
Note: For this dungeon you already need very good equipment.
.png)
Enigma Temple B
Random dungeon with varying location.
Level 90 - 120
Location:
Varies
Entry Requirements:
Treasure Scroll (Grade B)
Time Limit:
• None
Cooldown:
• None
Brief Description:
- The first level is always the same. You must defeat waves of monsters and destroy a Metin Stone.
- The second level offers two challenges, one of which is randomly selected:
- Metin Stone Level: Destroy Metin Stones until the treasure chest is found.
- Enigma General: Defeat monsters until the Enigma General appears. After defeating the General, the treasure chest appears.
- Afterwards, you have a chance to enter the bonus level.
- Locations in blue text have a higher chance for a bonus room.
Rewards:
•
.png)
Treasure Chest (Grade B)
•
Enigma Temple Bonus
•
Chance for Bonus Level
Note: Location varies depending on treasure scroll. All classes can participate.
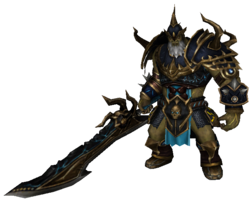
Erebos / Jotun Thrym
Has the highest group size requirement.
From Level 95
Body Warrior
Mental Warrior
Weapon Sura
Location:
Enchanted Forest
Entry Requirements:
 Stone of the Dryads
Time Limit:
• 30 Minutes
Cooldown:
• 2 Hours
Brief Description:
- The Stone of the Dryads is obtained through the quest series of the Forest Scout.
- At the beginning of the dungeon, Bagjanamu stands on the plateau and must be defeated.
- Afterwards, Jotun Thrym appears and must be defeated. Jotun Thrym spawns Ochao Healers that regenerate his HP.
Rewards:
•

9-11 Bagjanamu Chest
•

8-10 Jotun Thrym Chest
•
Much Yang
Note: This dungeon contains two bosses with different races and elements.
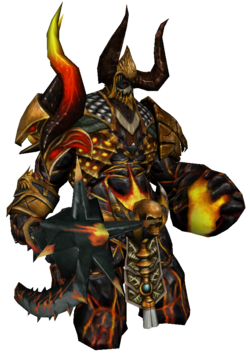
Red Dragon Fortress / Razador
Also a worthwhile low-level dungeon.
From Level 100
Body Warrior
Mental Warrior
Weapon Sura
Location:
Fire Land
Entry Requirements:
Passage Ticket
Time Limit:
• 60 Minutes
Cooldown:
• 30 Minutes
Brief Description:
- The fortress is divided into 7 zones. Zones 1-6 must be completed in a random order each time. In zone 7, the boss Razador awaits.
- Zone 1: Kill all monsters.
- Zone 2: Kill monsters and find the correct
 Golden Gear, which must be placed on the Stele of Isfet.
 - Zone 3: Kill all monsters.
- Zone 4: Kill Ignator.
- Zone 5: Kill monsters until you have destroyed all Steles of Isfet with the
 Stone of Maat. The order is random each time.
 - Zone 6: Destroy the Metin Stone of Purgatory.
- Zone 7: Defeat Razador.
Rewards:
•

8-10 Razador Chest
Note: In the "Maat Plateau", you can farm event drops like Okey Cards very efficiently.
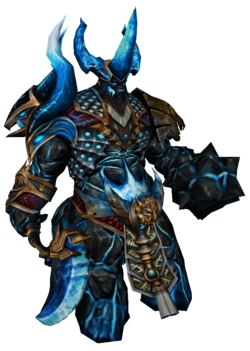
Nemere's Watchtower
Also counts as one of the first worthwhile dungeons.
From Level 100
Location:
Mount Sohan
Entry Requirements:
Time Limit:
• 60 Minutes
Cooldown:
• 4 Hours
Brief Description:
- The watchtower spans 10 floors, all of which must be completed in a fixed order.
- Floor 1: Kill all monsters.
- Floor 2: Kill monsters until you find the correct
 Frost Key. Only Shamans can use this.
 - Floor 3: Kill all monsters.
- Floor 4: Kill all monsters. The bosses of the second wave can only take damage if the player is under the Blessing buff.
- Floor 5: Kill monsters until you destroy Arktos' dice with the
 North Stars. The order is random each time.
 - Floor 6: Kill all monsters. Then the Metin of Cold spawns, which can only be damaged by Shamans.
- Floor 7: Kill the correct Boss Szel. Only players with the Dragon's Aid buff can damage the bosses. False bosses despawn when they only have half of their HP left.
- Floor 8: Kill monsters until the
 Frostflower Key is found. Only Ninjas can drop this key.
 - Floor 9: Destroy the Pillar of the North Dragon. Only Ninjas and Shamans can damage the pillar.
- Floor 10: Defeat Nemere.
Rewards:
•

8-10 Nemere Chest
Note: Without a Ninja and a Dragon Shaman this dungeon is not doable.
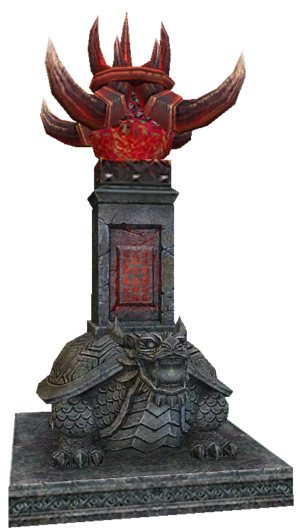
Time Rift Dungeons
This dungeon is only used for leveling.
From Level 110
Location:
Plateau of Illusions
Entry Requirements:
 Pocket Watch
Time Limit:
• 60 Minutes
Cooldown:
• None
Brief Description:
- The Time Rift Dungeons are harder versions of Beran-Setaou, Jotun Thrym, Razador and Nemere.
- At the Time Rift Statue, you can collect a reward after completing all dungeons.
- Upon receiving a Redux Tome, you will then have the opportunity to enter one of the Awakening Dungeons.
Rewards:
•
Redux Tome - after quest completion
Note: The Time Rift dungeons are mainly used for leveling or for event drops such as Okey Cards.
Redux Dungeons
Challenging redux dungeons.
From Level 110
Location:
Plateau of Illusions
Entry Requirements:
Redux Tome
Time Limit:
• 60 Minutes
Cooldown:
• None
Brief Description:
- The Redux Dungeons are harder versions of Beran-Setaou, Jotun Thrym, Razador and Nemere.
- Here you can farm upgrade materials for Dark Dragon equipment. Most players do not use this equipment, as farming it is very time-consuming.
Rewards:
•

Redux Chest
•

Beran-Setaou (RX)
•

Jotun Thrym Chest (RX)
•

Razadors Chest (RX)
•

Nemeres Chest (RX)
Note: Unlike in the Time Rift dungeons, Metin stones drop loot here, so it’s a great place to farm Thief’s Gloves or similar items
Yohara
.png)
Enigma Temple A
Random dungeon with varying location.
From Champion Level 1
Location:
Varies
Entry Requirements:
Treasure Scroll (Grade A)
Time Limit:
• None
Cooldown:
• None
Brief Description:
- The first level is always the same. You must defeat waves of monsters and destroy a Metin Stone.
- The second level offers two challenges, one of which is randomly selected:
- Metin Stone Level: Destroy Metin Stones until the treasure chest is found.
- Enigma General: Defeat monsters until the Enigma General appears. After defeating the General, the treasure chest appears.
- Afterwards, you have a chance to enter the bonus level.
- Locations in blue text have a higher chance for a bonus room.
Rewards:
•
.png)
Treasure Chest (Grade A)
•
Enigma Temple Bonus
•
Chance for Bonus Level
Note: Location varies depending on treasure scroll. One of the few ways to get Chest of Horse Skills.
.png)
Serpent Temple
Provides materials for serpent armor.
From Champion Level 1
Body Warrior
Mental Warrior
Weapon Sura
Location:
Yilad Pass
Entry Requirements:
Time Limit:
• 60 Minutes
Cooldown:
• None, 24 hours after 5 runs
Brief Description:
- The temple consists of 7 floors in total, with Floor 1 not being part of the actual dungeon.
- Floor 1: Here you must complete a quest to access Floor 2 of the dungeon.
- It is recommended to farm
 50x Serpent Dust to increase the dungeon timer.
- It is recommended to farm
- Floor 2: On this floor you need to kill monsters for ~6:30 minutes. The order of the first 4 monster groups is crucial for later progression and should be remembered.
- Floor 3: Destroy the elemental serpent metins in the order of spawns from the previous floor.
- Floor 4: Destroy the serpent metin stones and monsters. The spawn order of the metin stones is crucial for further progression and should be remembered. After eliminating the metins and some monsters, a Mighty Serpent Warrior (Earth) spawns, from which a Mighty Serpent Warrior (Ice) spawns. The number of all subsequently spawning Mighty Serpent Warriors (Ice) (0-3) is crucial for the final floor and should also be remembered.
- Floor 5: Monsters must be killed until you have destroyed all pillars with the
 Serpent Keys. The order of the pillars corresponds to the spawn order of the serpent metin stones from Floor 4.
 - Floor 6: On this floor all monsters must be killed. Additionally, you can free the captured blacksmiths with the found
 Prison Keys. Once the Serpent Temple Blacksmith has appeared, you can interact with him to enter the final floor.
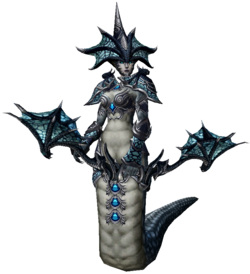
 - Floor 7: Before Serpent Queen Nethis spawns, the elemental serpent shards must be placed in the correct order on the serpent heads. The order of the elements depends on the element order from Floor 2 and the number of spawned Mighty Serpent Warriors (Ice) from Floor 4.
Afterwards, you must defeat Serpent Queen Nethis. The reward is obtained outside the dungeon at the serpent statue.
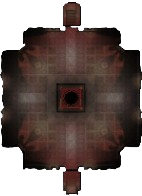
Floor 2: Element Order
Floor 3: Metin Order
Floor 4: Metin Spawn Order
Floor 7: Serpent Head Order
Rewards:
•

8x Serpent Treasure per Char
•
.png)
Serpent Jacket (craftable)
Note: In this run you can upgrade a glove at the blacksmith once a day without upgrade costs. On failure, the level decreases by 1.
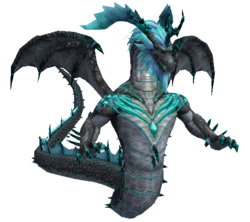
Alastor (easy / hard)
Provides materials for serpent weapons.
From Champion Level 1
Location:
Northwind Deeps
Entry Requirements:
 3x Frozen Key
Time Limit:
• 30 Minutes
Cooldown:
• None
Brief Description:
- The dungeon is started at the White Dragon Egg in the center of the room by the group leader.
- After one minute, a total of 12 ice patches spawn at regular intervals under the players. These ice patches deal extremely high damage and remain for the entire duration of the run. It is therefore recommended to gather all side characters in one place - preferably opposite the entrance.
- After all 12 ice patches have spawned, move with Alastor to the entrance area to avoid the spawning monsters as much as possible.
- Alastor has several attacks. The most dangerous is a skill that, after a charging phase, reflects all damage taken back to the player. As soon as you recognize the charging phase, you should stop dealing damage.
- The charging phase is recognized by Alastor closing his wings and a magical orb appearing around him. This skill is used approximately every ~30 seconds.
- The easy Alastor is of Ice type. The hard Alastor is of Lightning type.
- The reward is obtained after the boss fight from the Ghostly Guardian.
Rewards:
•
.png)
8x Wh. Dragon Chest (light) per Char
•
.png)
8x Wh. Dragon Chest (heavy) per Char
Note: The frozen keys are usually very expensive or the farm spot for them is very contested.
Balathor's Crypt
Guild dungeon for advanced players.
From Champion Level 4
Location:
Mount Sohan
Entry Requirements:
 Passage Ticket (Balathor)
Time Limit:
• 60 Minutes
Cooldown:
• 3 Hours
Brief Description:
- The run is divided into two phases. In the first, you indirectly damage Balathor with the Hwacha. In the second phase, you actively fight Balathor. The second phase can only be reached after ~10 minutes. If you kill Balathor before that, the second phase will not occur.
- Phase 1: Initially, you must kill a small mob group, an ancient ice crystal, destroy the massive ice walls and the frozen dragon eggs. Then place the two fiery dragon eggs in front of Balathor. Now collect Fire Arrows by destroying the ancient ice crystals, which charge the Hwacha and damage Balathor. After firing the Hwacha for the first time, you can destroy the frozen dragon eggs. If you "defeat" Balathor for the first time after +10 minutes, he will fly onto the battlefield.
"It’s recommended to fully load the Hwacha with fire arrows and keep some extra fire arrows in your inventory before firing it for the first time. - Phase 2: Once Balathor is down on the battlefield, you can attack him directly. At regular intervals, Balathor spawns 4 eggs, each of which must be destroyed within 10 seconds, otherwise the second phase is lost. If you lose Phase 2, each player can collect 1x Balathor's Frost Chest.
- Tips: With the help of the Shaman skill Cure, you are immediately freed from the frozen state.
The guild skill Balathor's Will should definitely be used during Phase 2, as it protects against freezing.
Rewards:
•

Balathor's Frost Chest
•

Balathor's Frost Chest+
Note: With the Passage Tickets (Balathor) you can bypass the cooldown. The chests contain, among other things, a lot of Yang.